Introduction to Digital Meat Thermometers
Cooking meat can be a daunting task, especially when it comes to ensuring it is done just right. Many home cooks struggle to find that perfect balance between undercooked and overcooked meat. However, a digital meat thermometer simplifies the process. This guide will teach you how to use a digital meat thermometer effectively, empowering you to achieve tender and juicy meat every time you cook.
Using a digital meat thermometer is crucial for several reasons. First, it helps you avoid foodborne illnesses by ensuring meats are cooked to safe internal temperatures. Second, it helps you maintain the quality and tenderness of your meat, preventing the disappointment of a dry or overcooked meal. With these devices gaining popularity, it’s the perfect time to learn how to use a digital meat thermometer effectively.
What is a Digital Meat Thermometer?
Digital meat thermometers are essential tools for cooking meat to perfection. They provide precise temperature readings, ensuring food is safe and delicious.
Overview of Digital Meat Thermometers
Digital meat thermometers have electronic displays showing accurate temperature readings instantly. They come in various designs, such as handheld or connected devices. They use sensors to measure internal food temperature quickly. These thermometers are reliable for eliminating guesswork in cooking. Functions may include timers, alarms, and wireless connectivity, enhancing user convenience.
Advantages Compared to Analog Thermometers
Digital thermometers are faster and more precise than analog thermometers. They offer instant readings, saving cooking time. The digital display ensures clarity, avoiding errors in interpretation. Some models come with advanced features like Bluetooth connectivity. These features make cooking easier and more efficient compared to analog thermometers.
Types of Digital Meat Thermometers
Digital meat thermometers come in several types to suit different cooking needs. Knowing their differences helps you choose the best option.
Instant-Read Thermometers
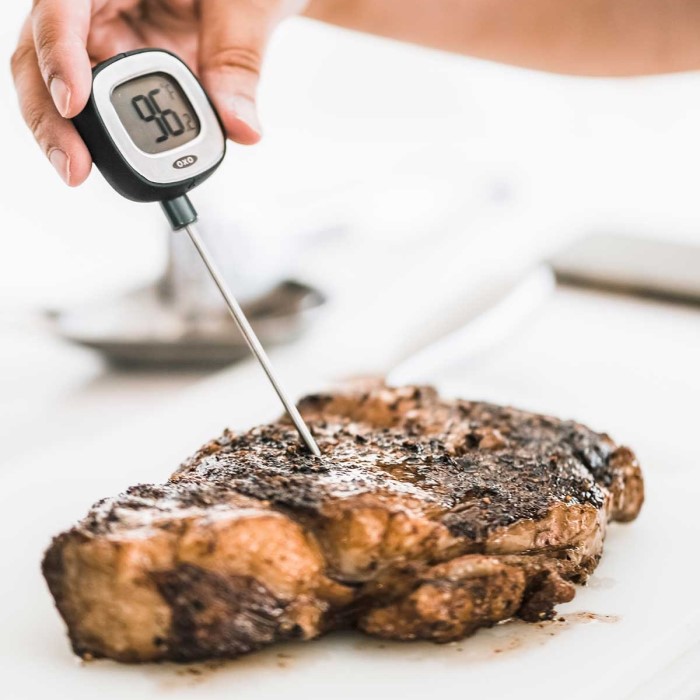
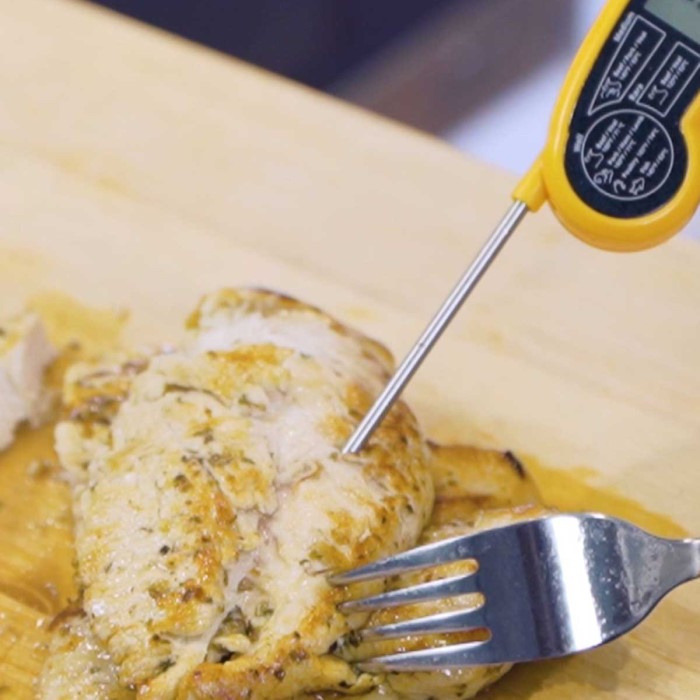
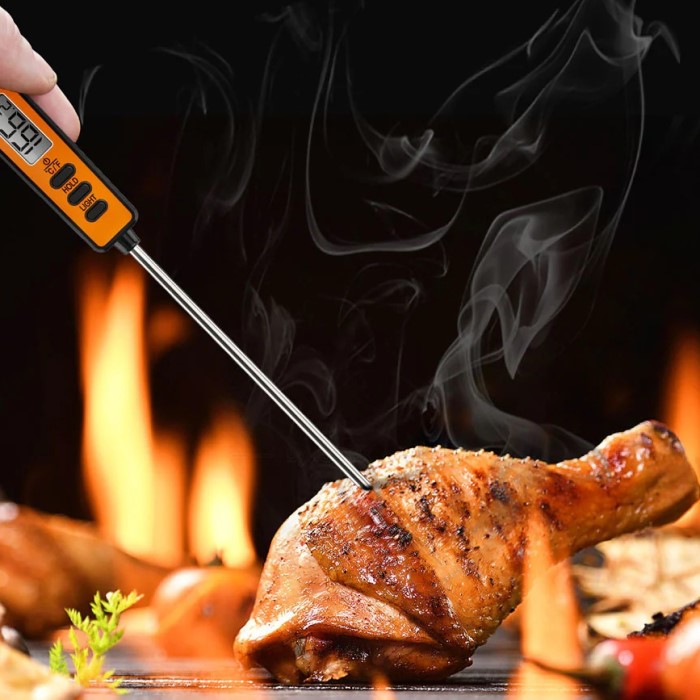
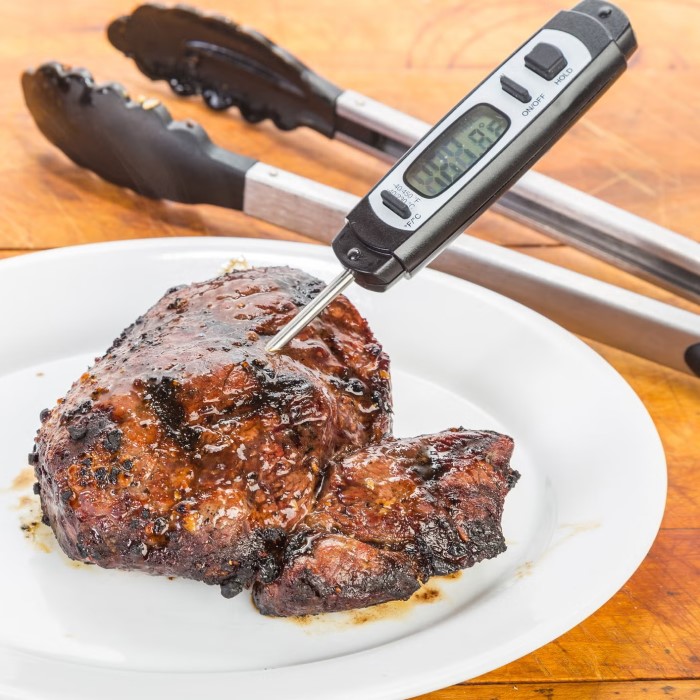
Instant-read thermometers deliver quick temperature readings within seconds. They are ideal for fast checks during cooking. These tools are portable and typically small in size. Use them for thin cuts of meat, such as steaks or chicken breasts. Insert the probe briefly, and make sure to avoid touching bone for an accurate reading.
Probe Thermometers
Probe thermometers have a long, heat-resistant cable connecting the probe to the digital display. These thermometers are perfect for monitoring meat while it cooks, such as roasts or whole poultry. Insert the probe into the thickest part of the meat before cooking. Their design lets you easily check temperatures without opening the oven or grill.
Wireless and Bluetooth Thermometers
Wireless thermometers, including those with Bluetooth, offer advanced monitoring features. They allow you to check temperatures remotely using a smartphone or dedicated receiver. These thermometers often include multiple probes to track several dishes simultaneously. They are great for cooking large meals or barbecues. Wireless features help maintain consistent temperatures without constant manual checks.
How to Properly Use a Digital Meat Thermometer
Using a digital meat thermometer correctly ensures your food is safe and perfectly cooked.
Steps to Measure Meat Temperature Accurately
- Turn on your thermometer and ensure it’s functioning properly.
- Insert the thermometer probe into the thickest part of the meat.
- Avoid touching bones or fat to get an accurate reading.
- Wait for the digital display to show a stable temperature.
- Compare the reading with recommended safe cooking temperatures.
- Clean the probe immediately to remove any residue.
Correct Placement of the Thermometer Probe
Proper placement of the thermometer probe is crucial for accurate readings:
- Place the probe in the thickest part of the meat.
- Ensure it doesn’t make contact with the bone. Bones conduct heat inaccurately.
- For poultry, probe the breast or inner thigh away from the bone.
- For roasts, position it in the center for a clear temperature.
Importance of Calibration for Accuracy
Calibration keeps your thermometer reliable. Follow these tips to ensure consistent accuracy:
- Check the instruction manual for calibration steps.
- Use ice water or boiling water as reference points. Ice should show 32°F; boiling water 212°F.
- Regularly calibrate your thermometer to account for wear and tear.
- If readings seem off, recalibrate before cooking.
Temperature Guidelines for Common Meats
Knowing proper cooking temperatures ensures meat is safe and delicious. Different meats require specific temperature targets.
Safe Cooking Temperatures for Poultry
Poultry such as chicken and turkey must reach 165°F to avoid harmful bacteria. Insert the digital meat thermometer into the thickest part of the breast or inner thigh, avoiding the bone. For stuffed poultry, check both the meat and stuffing for correct temperatures.
Recommended Temperatures for Beef, Pork, and Lamb
Beef
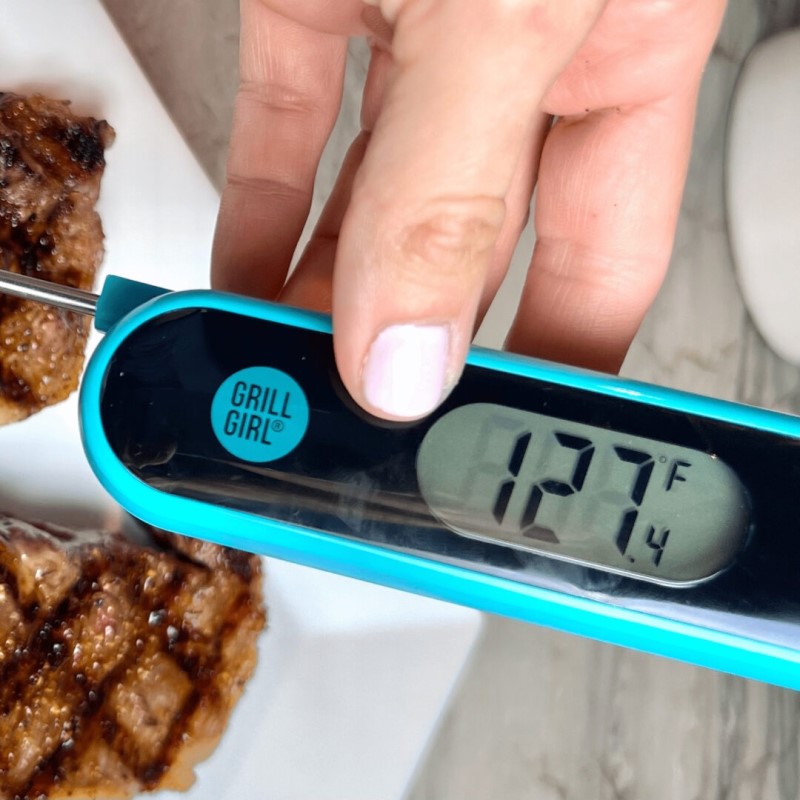
- Medium-Rare: To achieve a perfect medium-rare steak, the internal temperature should reach 135°F. At this temperature, the beef will have a warm red center, offering a tender and juicy experience.
- Medium: For those who prefer their beef cooked a bit more, medium doneness is attained at 145°F. This will result in a pink center and a firmer texture while still retaining some moisture.
- Well-Done: When beef is cooked to well-done, it reaches an internal temperature of 160°F. At this level, the meat will be fully cooked through, resulting in a brown center with little to no pink remaining.
Pork
- Cooking Temperature: Pork cuts should be cooked to an internal temperature of 145°F. This ensures that the meat is safely cooked to reduce the risk of foodborne illness.
- Resting Time: After reaching the desired temperature, it is crucial to let the pork rest for three minutes before slicing or serving. This resting period allows the juices to redistribute throughout the meat, yielding more flavorful and juicy results.
Lamb
- Rare: For those who enjoy their lamb on the rare side, it should be cooked to an internal temperature of 125°F. This results in a red, cool center, ideal for tenderness.
- Medium-Rare: Medium-rare lamb reaches an internal temperature of 135°F. At this stage, it will have a warm pink center, offering a balance of flavor and tenderness.
- Well-Done: Lamb that is cooked to well-done should reach an internal temperature of 160°F. This will result in fully cooked meat with a brown center, which may lose some moisture but is still flavorful when cooked properly.
To check roast temperatures, place the thermometer in the center away from edges.
Handling Temperature for Fish and Seafood
Fish and seafood cook quickly and need caution. The safe internal temperature is 145°F. Test the thickest part of the fish with the thermometer. Look for opaque flesh and flaky texture as visual signs of doneness. For shellfish, ensure all shells open fully during cooking. Avoid overcooking to retain flavor and texture.
Maintenance and Cleaning Tips
Proper maintenance ensures your digital meat thermometer remains accurate and lasts longer. Follow these cleaning and storage tips to keep it in top condition.
Cleaning Methods to Avoid Damage
- Avoid immersing the thermometer in water: Most digital thermometers are not fully waterproof.
- Wipe with a damp cloth: Use mild soap and water for cleaning the probe and exterior.
- Clean immediately after use: Residue hardens, making it harder to remove later.
- Use alcohol wipes for disinfection: This ensures the probe remains sanitary for future use.
- Avoid abrasive cleaning materials: These can scratch or damage the device’s surface.
- Check the manual for specific instructions: Follow manufacturer guidelines to prevent accidental damage.
Proper Storage for Long-Term Usage
- Store in a protective case: Many thermometers come with cases to keep probes safe from damage.
- Keep in a dry and cool place: Excess heat or moisture may damage electronic parts.
- Avoid loose wires: For models with probes and cables, secure them to prevent tangling.
- Remove batteries if unused: This avoids battery leaks causing serious damage to the thermometer.
- Place it out of children’s reach: This ensures safety and prevents accidental damage.
Troubleshooting Common Issues
Inaccurate Readings
- Recalibration Needed: If you find that your thermometer is providing inaccurate readings, it may need recalibration.
- User Guide Reference: To properly recalibrate the device, refer to the user guide that came with your thermometer. This guide typically includes step-by-step instructions specific to your model, ensuring that you can restore its accuracy.
Device Not Powering On
- Battery Check: If the thermometer fails to turn on, the first step is to check the battery levels. Low or dead batteries can prevent the device from functioning.
- Replace Batteries: If the battery levels are low, replace the old batteries with fresh ones. Make sure to install them according to the indicated polarity (+/-) to avoid any issues.
Erratic Temperature Changes
- Probe Inspection: If you notice that the temperature readings fluctuate unexpectedly, inspect the probe closely for any physical damage, such as bends or cracks.
- Check Connections: Additionally, ensure that all connections are secure and not loose. A compromised connection can lead to fluctuating or unreliable readings.
Display Malfunction
- Screen Cleanliness: If the display is not functioning correctly or is hard to read, start by ensuring that the screen is clean.
- Remove Debris: Wipe the screen gently with a soft, lint-free cloth to remove any dirt or debris that might be obstructing visibility.
Wireless Issues
- Bluetooth Connection: In cases where the thermometer is equipped with wireless capabilities, and you are experiencing connectivity issues, try reconnecting the Bluetooth devices.
- Reset Connection: If reconnecting does not resolve the issue, consider resetting the thermometer’s connection to your device. This process sometimes resolves temporary glitches.
Persistent Problems
- Manufacturer Contact: If you are still experiencing issues after trying the above steps, it may be time to contact the manufacturer directly.
- Repairs or Replacement: Explain the problems you are encountering to their customer service team, and inquire about options for repairs or replacement of the thermometer if necessary.
Additional Features to Look for in Digital Meat Thermometers
Digital meat thermometers come with extra features that make cooking even easier and more precise. These added functionalities improve user convenience and elevate your cooking experience.
Backlit Displays and Timers
Backlit displays ensure visibility in all lighting conditions, especially in dim kitchens or nighttime barbecues. Timers allow you to track cooking time without needing separate devices. Alarms can alert you when your food reaches the desired temperature. Together, these features help avoid overcooking or undercooking.
Wireless Connectivity Options
Wireless connectivity, including Bluetooth or Wi-Fi, enables remote temperature monitoring using a smartphone or tablet. This adds flexibility and convenience, especially for large meals. Many wireless thermometers allow the use of multiple probes to track different dishes at once. Alerts can be set to notify you when food is ready, even when you’re away from the grill.
Durability and Waterproof Capability
Durable construction ensures the thermometer withstands high heat and frequent use. Waterproof models can handle kitchen spills or outdoor cooking in various weather conditions. This feature enhances their longevity and reliability. Some thermometers are even submersible for easy cleaning without worrying about water damage.
Choosing a thermometer with these added features can simplify cooking and guarantee perfect results every time.
Frequently Asked Questions
How Often Should a Digital Meat Thermometer Be Calibrated?
Calibrate your digital meat thermometer regularly to maintain accuracy. For frequent use, calibrate monthly. For occasional use, calibrate every few months. Check for calibration if temperatures seem incorrect. Follow the manufacturer’s guidelines for precise steps.
Can It Be Used for Non-Meat Foods?
Digital meat thermometers work well for non-meat foods. They can measure baking temperatures and liquid temperatures. Use them to check candy or caramel temperatures. They are also helpful for soups and reheating leftovers. Consult your thermometer’s manual for specific applications.
How Long Do Batteries Typically Last?
Battery lifespan varies by thermometer type and usage frequency. Standard batteries last 6–12 months with regular use. Check for signs like weak display or device failure to replace batteries. Remove batteries if storing the thermometer for a long time to prevent leakage.
Conclusion
Learning how to use a digital meat thermometer can be a game-changer in your cooking journey. With the ability to ensure tender and juicy meat, you can bid farewell to undercooked or dry meals. By following the steps outlined in this guide and avoiding common mistakes, you can elevate your culinary skills significantly.
Remember, a digital meat thermometer not only guarantees the safety of your meals but also enhances their flavor and quality. So the next time you’re in the kitchen, reach for your digital meat thermometer and take the guesswork out of cooking meat. Embrace the joy of perfectly cooked dishes that will impress your family and friends and keep them coming back for more!