What is a Digital Oven Thermometer?
A digital oven thermometer is a tool for measuring oven temperatures. It ensures accurate and consistent heat levels. This thermometer uses digital sensors to provide precise readings. It helps to improve cooking and baking results.
Features and Benefits of Digital Oven Thermometers
Digital oven thermometers provide fast and accurate temperature readings. This reduces guesswork during cooking. Many models have clear displays for easy visibility. Some offer adjustable alerts for specific temperature ranges. Most are lightweight and simple to use. Using these thermometers enhances food safety and improves recipe outcomes. They help you avoid overcooking or undercooking meals.
Types of Digital Oven Thermometers Available
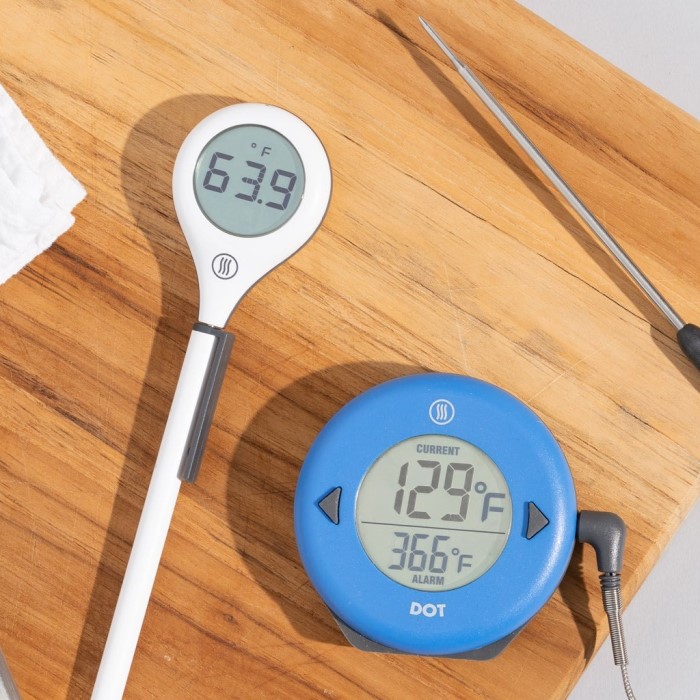
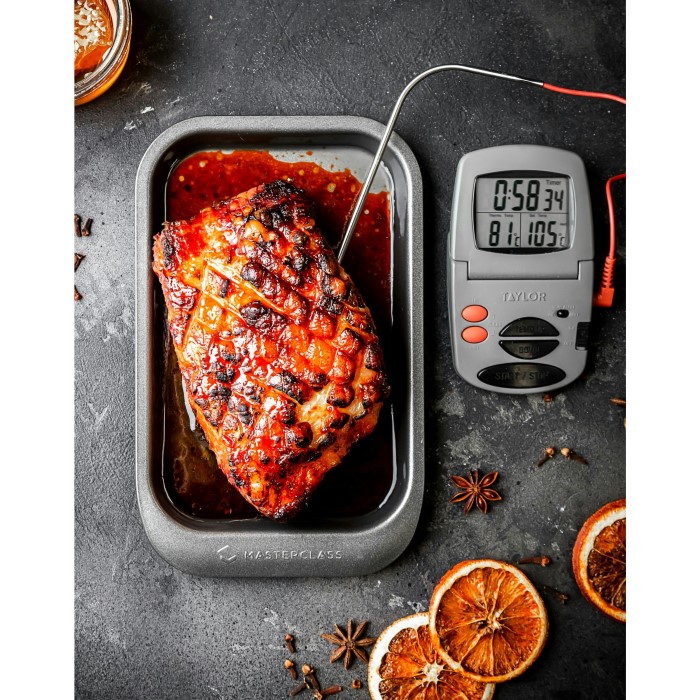
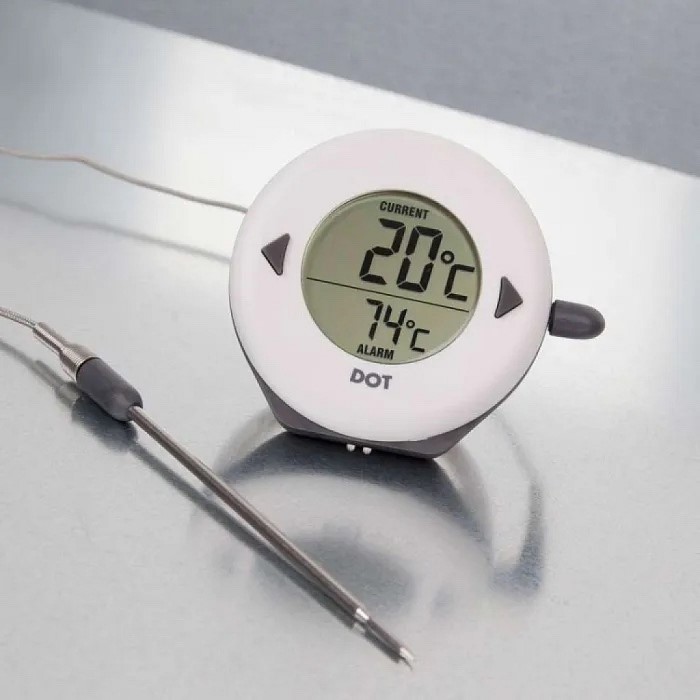
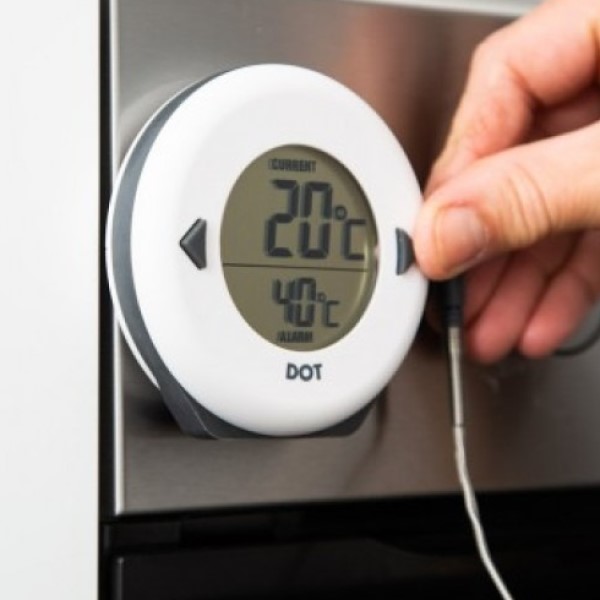
There are two main types: probe thermometers and oven-safe thermometers. Probe thermometers have wired components for real-time readings. These are ideal for monitoring food temperatures while cooking. Oven-safe thermometers are placed inside the oven and measure ambient temperatures. Some models feature advanced wireless or Smart connectivity for remote monitoring. Choose a type based on cooking preferences and needs.
Why You Need a Digital Oven Thermometer
Importance of Accurate Temperature Readings in Cooking
Accurate temperature readings are crucial when cooking or baking. Each recipe requires specific heat settings. A small variation can ruin the outcome. Overheating may dry food out, while low heat can lead to undercooked meals. A digital oven thermometer ensures precise and consistent temperatures.
Using your oven’s built-in thermometer is often unreliable. They can have discrepancies due to calibration issues. A digital oven thermometer provides dependable accuracy. This tool helps you follow recipes correctly and maintain food safety standards. It’s essential for ensuring poultry, meats, and baked goods reach their perfect temperatures.
How It Improves Cooking and Baking Outcomes
A digital oven thermometer enhances the quality of your dishes. Precise temperature control ensures even baking and cooking. Cakes rise properly, and cookies bake evenly without burning. Meats stay juicy and flavorful without being undercooked.
This tool reduces guesswork and improves consistency in your results. Adjustable temperature alerts make it easier to monitor cooking progress. This ensures timely adjustments to prevent overcooking or undercooking. By managing your oven’s heat accurately, every dish turns out as intended, from roasts to pastries.
Investing in a digital oven thermometer saves you time and effort. It simplifies the process and boosts your confidence in the kitchen. Reliable temperature readings help you achieve professional-quality results at home. For consistent success in cooking and baking, a digital oven thermometer is indispensable.
Steps for Setting Up
Setting up your digital oven thermometer correctly is essential for accurate readings. Proper preparation and calibration ensure it performs at its best.
Preparing Your Oven and Thermometer
- Start with a Clean Oven: Remove any food residues or grease. A clean oven helps ensure accurate readings.
- Read the Manual: Check the instructions included with your thermometer. Different models may have unique setup procedures.
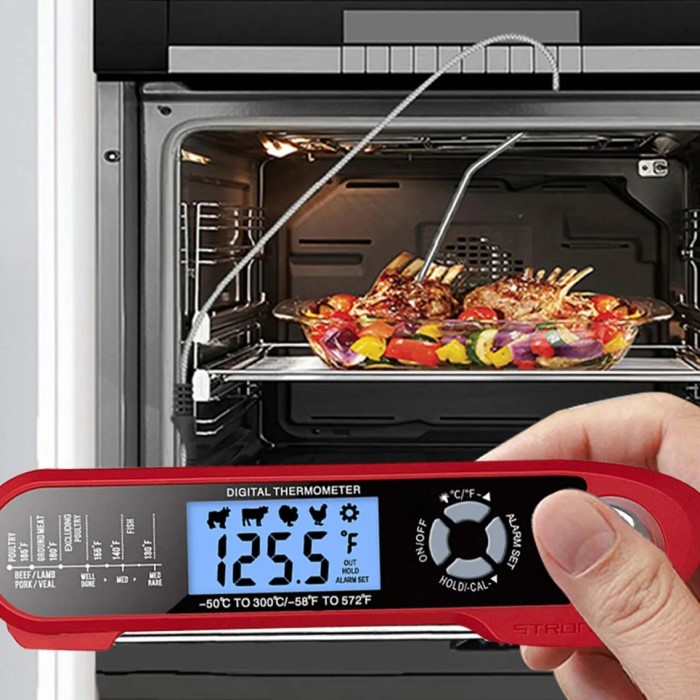
- Position the Thermometer Correctly: Place the thermometer in the center of the oven. Avoid putting it near the walls or heating elements.
- Avoid Preheating Immediately: Set up the thermometer before starting the oven. This prevents sudden exposure to extreme heat.
- Inspect for Damage: Check for any visible damage to the thermometer. Replace batteries if needed.
Calibration Tips for Accuracy
- Test in Boiling Water: For probe thermometers, dip the probe in boiling water. It should read 212°F (100°C) at sea level.
- Use an Ice Water Bath: Place the probe in a cup of ice water. It should read 32°F (0°C).
- Adjust Settings: Some thermometers allow calibration adjustments. Follow the manual for precise recalibration.
- Test Oven Temperature: Preheat the oven and use the thermometer to check consistency. Compare with the oven’s built-in thermostat.
- Repeat Regularly: Periodically recalibrate your thermometer to maintain accuracy over time.
Proper preparation and calibration make your digital oven thermometer a reliable cooking companion. These steps ensure your readings are precise for better cooking results.
How to Use a Digital Oven Thermometer Effectively
A digital oven thermometer is more than just a helpful tool. Knowing how to use it properly ensures your cooking outcomes remain consistent and accurate. Follow these steps to make the most of your thermometer.
Steps for Measuring Oven Temperature
- Position the Thermometer Correctly: Place the thermometer in the center of your oven for accuracy. Avoid putting it near walls, doors, or heating elements, as these areas may give inconsistent readings.
- Turn On the Oven: Set your oven to the temperature listed in your recipe. Avoid adjusting the temperature at this stage.
- Check the Temperature: Allow the oven to reach its desired temperature. Then, read your thermometer’s display to check if the oven matches the setting. This typically takes around 10-15 minutes.
- Compare with Oven Settings: If there’s a discrepancy between the oven and thermometer readings, note the difference. Use the thermometer reading as your guide while cooking.
- Make Adjustments if Needed: Adjust your oven temperature knob to match what the thermometer displays. This helps maintain consistent cooking results.
Identifying Hotspots in Your Oven
Hotspots can affect the outcome of your cooking. Using your digital oven thermometer, you can identify and manage these areas:
- Test Multiple Oven Spots: Place the thermometer in different oven sections—center, corners, and near the door. Check the reading in each spot.
- Record the Variations: Write down the temperature differences between these zones. Hotspots often appear near heating elements or poorly insulated areas.
- Rotate Your Dishes: Rotate food during cooking to counteract hotspot effects. This ensures even cooking and baking.
- Reposition Oven Racks: Adjust your racks for better heat circulation. Some thermometers may come with guides for ideal rack placement.
- Repeat Tests Periodically: Hotspots can develop over time. Retest your oven occasionally to maintain accurate cooking results.
By following these steps, you maximize the benefits of your digital oven thermometer. Accurate readings and identifying hotspots ensure all your dishes cook evenly and taste great.
Common Mistakes to Avoid
Using a digital oven thermometer properly ensures accurate cooking results. Avoid these common mistakes to get reliable readings.
Misplacement of the Thermometer
- Placing Too Close to Heating Elements: Avoid positioning the thermometer near oven walls or heating elements. These spots often give skewed readings and do not reflect the overall oven temperature.
- Not Centering the Thermometer: Always place the thermometer in the middle of the oven. This position represents the most accurate temperature for even cooking.
- Not Repositioning for Hotspot Testing: Regularly test the thermometer in various locations to identify potential hotspots in your oven.
- Blocking the Probe: Ensure food or oven racks do not cover or block the thermometer probe. Obstructions can lead to false readings.
By placing your thermometer correctly, you ensure more precise and consistent temperature measurements.
Ignoring Calibration Instructions
Skipping Initial Calibration:
-
- It is crucial to calibrate your thermometer prior to its first use. This initial calibration step ensures that the thermometer’s readings are accurate and reliable.
- Failure to calibrate can lead to significant discrepancies in temperature measurements, which may affect cooking, scientific experiments, or industrial processes.
Not Periodically Recalibrating:
-
- Regular recalibration of your thermometer is essential to maintain its accuracy over time. This is particularly important as physical wear and sensor drift can occur with prolonged use.
- Establish a routine schedule for recalibration based on the frequency of use, as well as environmental factors that may affect the thermometer’s performance.
Using Without Water Tests:
-
- To verify the accuracy of your thermometer, conduct tests in both boiling water and ice water. For boiling water, the temperature should reach 212°F (100°C) at sea level, while ice water should be 32°F (0°C).
- Performing these tests can help you detect any inaccuracies and ensure that the thermometer is functioning correctly before relying on it for precise measurements.
Relying Solely on Default Settings:
-
- Many thermometers come with default calibration settings; however, not all of these are accurate for every device. It’s advisable to read the manufacturer’s manual for guidance on adjusting calibration settings if you notice discrepancies in the readings.
- Customizing the settings can help you achieve more precise measurements and enhance the overall reliability of your thermometer.
Overlooking Damage:
-
- Before calibrating your thermometer, conduct a thorough inspection for any signs of physical damage, such as cracks or frayed wires, as these can significantly impair functionality.
- Additionally, check the battery to ensure that it is functioning correctly, as weak or depleted batteries can lead to erroneous temperature readings. Addressing any issues prior to calibration will help maintain the accuracy and reliability of the thermometer.
Proper calibration ensures your thermometer functions at its best. These steps prevent inaccurate temperature readings and cooking mishaps.
Care and Maintenance Tips
Proper care and maintenance help extend your digital oven thermometer’s lifespan. These practices ensure accurate readings and reliable performance.
Proper Cleaning Techniques
- Remove Batteries Before Cleaning: Take out the batteries to prevent moisture damage. Check for corrosion periodically.
- Use a Soft Cloth: Wipe the thermometer with a soft, damp cloth. Avoid abrasive cleaners that might scratch the surface.
- Clean the Probe Separately: Wash the probe gently with mild soap and warm water. Dry thoroughly before storing.
- Avoid Submerging in Water: Digital thermometers aren’t typically waterproof. Keep the device away from sinks or dishwashers.
- Inspect for Residue: Regularly check for grease or food particles. These can affect readings if left uncleaned.
Proper cleaning ensures consistent readings and prevents buildup that might harm the device.
Storage Recommendations
- Keep in a Cool, Dry Place: Store your thermometer away from heat and moisture to avoid damage.
- Use a Protective Case: Many thermometers come with a case. Use it to prevent scratches and physical harm.
- Avoid Tangling Wires: For probe thermometers, organize the wires carefully to avoid bending or breaking.
- Remove Batteries for Long Storage: If not in use for a while, take out the batteries to prevent leaks.
- Store Safely: Keep the thermometer out of children’s reach or heavy objects that could crush it.
Following these storage tips protects your thermometer from wear and extends its usability.
Frequently Asked Questions
How to Troubleshoot Common Issues
Troubleshooting your digital oven thermometer ensures accurate readings and reliable performance. Here’s how:
- Inconsistent Temperature Readings: Check if the thermometer is positioned correctly. Recalibrate it to ensure precision.
- Blank or Fading Display: Replace the batteries and ensure the battery compartment is clean. Avoid corrosion buildup.
- Device Is Not Turning On: Inspect battery orientation. Ensure batteries are inserted correctly. Replace old or damaged batteries.
- Incorrect Readings in Hot/Cold Tests: Test the thermometer with boiling water (212°F) and ice water (32°F). Recalibrate if readings differ.
- Sensor Issues: If the probe malfunctions, clean and dry it properly. Replace it if damage is visible.
For persistent issues, consult the product manual or contact the manufacturer’s support team for assistance.
How Often Should You Replace or Calibrate Your Thermometer
Regular maintenance keeps your digital oven thermometer performing reliably. Follow these guidelines:
Replace Batteries Periodically:
-
- It is essential to replace the batteries of your thermometer every 6 to 12 months to ensure optimal performance.
- Pay close attention to the battery level; if you notice the screen starting to dim or flicker, it is a clear indication that the batteries need replacing.
- Frequent replacement helps prevent unexpected shutdowns or inaccuracies during measurement.
Inspect for Wear:
-
- Conduct regular inspections of your thermometer to identify any signs of damage or wear.
- Look for physical issues, such as cracks in the casing, an unresponsive screen, or any frayed or damaged wires, especially if it’s a digital model.
- If parts are broken or show significant signs of wear, it is advisable to replace the thermometer to ensure accuracy and safety during use.
Calibrate Before First Use:
-
- Before using a new thermometer for the first time, it is important to calibrate it to confirm its accuracy.
- A simple calibration test can be done by placing the thermometer in boiling water and then in ice water. Both readings should correspond to known temperature values (100°C for boiling and 0°C for ice).
- If your thermometer allows for setting adjustments, make the necessary changes to ensure your readings are accurate right from the start.
Recalibration Schedule:
-
- To maintain precision in measurements, it is recommended to recalibrate the thermometer every 3 to 6 months.
- If you use the thermometer frequently or in a professional setting, consider performing recalibration more regularly to ensure continued reliability.
- Keep a log of calibration dates and results to track the accuracy over time.
Upgrade for Better Performance:
-
- If you find that your older thermometer frequently gives incorrect readings, it may be time to consider an upgrade.
- Look for advanced models that offer improved technology, such as digital displays with high accuracy or features like wireless connectivity.
- Investing in a more reliable thermometer can greatly enhance your cooking or scientific tasks, ensuring better outcomes and fewer frustrations.
Maintaining and calibrating your thermometer ensures consistent results. Replace it when needed to avoid cooking mistakes.
Conclusion
In summary, mastering how to use a digital oven thermometer can make a significant difference in your culinary adventures. This tool provides the accuracy required for perfect cooking results, enabling you to serve delicious meals every time. By understanding the types available, ensuring proper calibration, and following our step-by-step guide, you’ll enhance your cooking game. Embrace this technology and watch as your kitchen transforms into a hub of culinary excellence, all thanks to the precise readings of a digital oven thermometer!