Introduction to Calibrating Digital Thermometers
Digital thermometers are indispensable tools in various settings, from kitchens to laboratories and healthcare facilities. They provide quick and accurate temperature readings, essential for cooking, scientific experiments, and medical diagnoses. However, over time, these devices can drift and yield inaccurate results if not properly maintained. Therefore, understanding how to calibrate digital thermometer is crucial for ensuring accuracy and reliability.
In this article, we will delve into the calibration process, discuss why calibration matters, explore various methods to achieve it, and offer tips for maintaining the accuracy of your digital thermometer. By the end, you will be equipped with the necessary knowledge to calibrate your thermometer effectively.
Importance of Calibrating Digital Thermometers
How to calibrate digital thermometer? Digital thermometer calibration is essential for reliable temperature measurements. Precision in readings ensures proper decisions in various scenarios. Regular checks prevent errors.
Ensuring Accuracy in Temperature Readings
Calibrating your digital thermometer improves reading accuracy. Accurate data helps with cooking, healthcare, and lab work. It eliminates the risk of incorrect results from aging or faulty devices. Reliability builds trust in thermometer performance.
Applications Where Calibration is Crucial
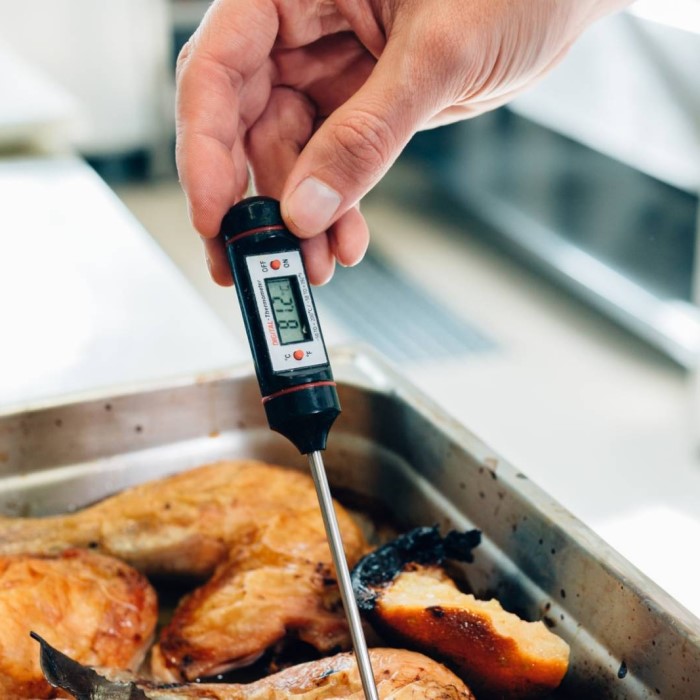
Calibration is vital in industries and daily life. In healthcare, accurate readings monitor body temperature correctly. In cooking, precise measurements ensure food safety and prevent overcooking. Laboratory settings demand calibrated thermometers for sensitive experiments. Calibration ensures consistency across diverse applications.
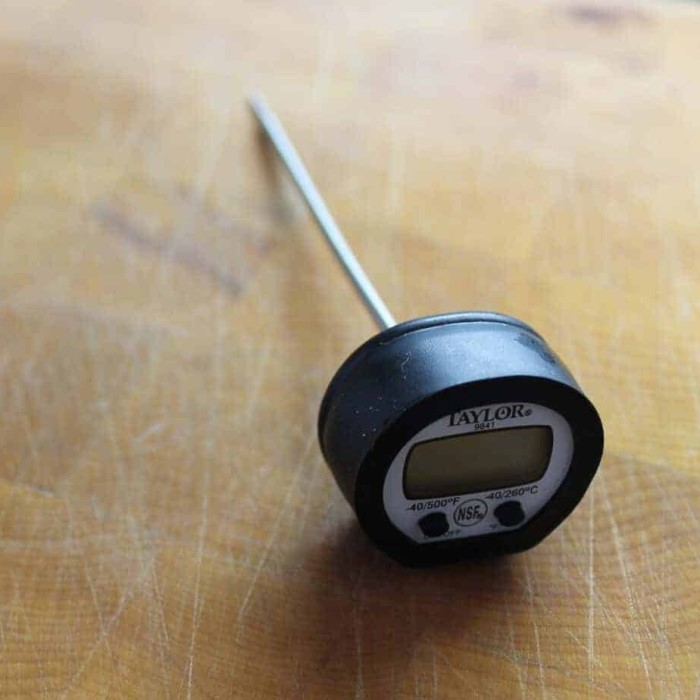
Tools and Materials Needed for Calibration
How to calibrate digital thermometer? Calibrating a digital thermometer requires specific tools to ensure the process is effective and accurate. Using the right materials minimizes errors and provides consistent results.
Common Equipment Used for Calibration
- Ice and Water: Essential for the ice point method. Use clean ice and distilled water.
- Boiling Water: Needed for the boiling point method. Ensure the water reaches 100°C (212°F) at sea level.
- Calibration Bath: Useful for controlled temperature measurements, especially in laboratory settings.
- Thermometer Holder: Keeps the thermometer stable during calibration.
- Timer or Stopwatch: Tracks time intervals for precise measurements.
- Thermal Gloves: Protects your hands when handling hot or cold objects.
Importance of Reference Instruments
- Calibrated Standard Thermometer: Acts as a reliable temperature reference during calibration.
- Calibration Logs: Records data to track consistency over time.
- Thermal Stability Tools: Ensure temperature remains stable for accurate comparisons.
- Protective Storage Case: Keeps instruments safe from damage after use.
Using the right tools ensures precise digital thermometer calibration. Proper equipment protects against inaccurate readings and unreliable results.
Understanding Calibration Standards
Calibration standards ensure accurate and reliable thermometer readings. Two common methods include the ice point method and the boiling point method. These processes utilize natural temperature benchmarks to verify the thermometer’s accuracy.
Ice Point Method
The ice point method is a simple and reliable way to calibrate a digital thermometer. Follow these steps:
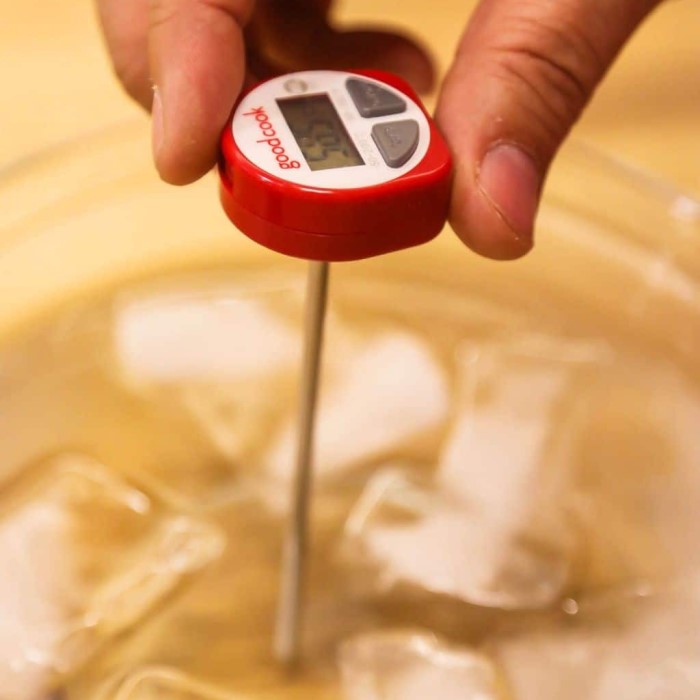
- Prepare Ice Water: Fill a container with crushed ice and add distilled water. Ensure the mixture reaches slush consistency.
- Insert the Thermometer: Place the thermometer probe in the mixture, ensuring it does not touch the container’s sides or bottom.
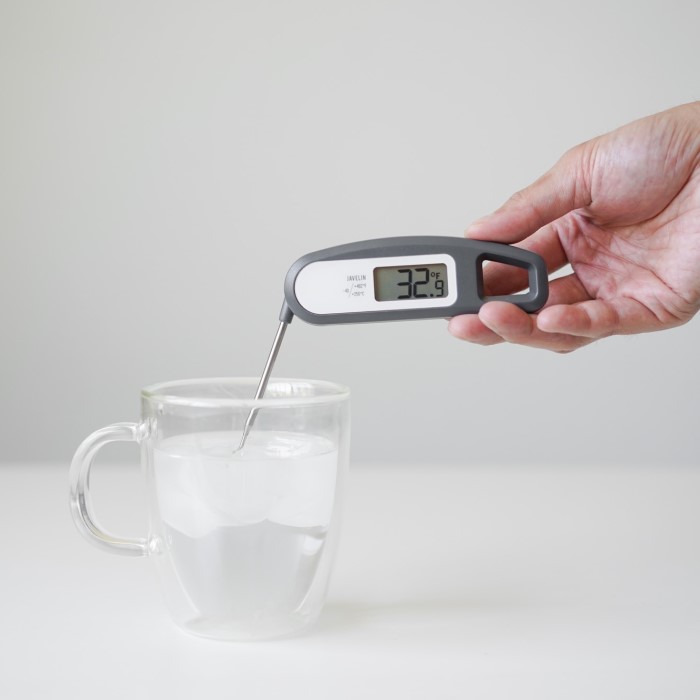
- Wait for a Steady Reading: Allow the thermometer to stabilize. It should read 0°C (32°F).
- Check and Adjust: If the thermometer does not display 0°C (32°F), adjust it according to the manufacturer’s instructions.
This method is essential for applications requiring precise cold temperature measurements.
Boiling Point Method
The boiling point method calibrates thermometers using the boiling temperature of water. Keep these steps in mind:
- Boil Clean Water: Heat a pot of distilled water until it reaches a rolling boil.
- Place the Thermometer: Insert the probe into the boiling water, avoiding contact with the container sides or bottom.
- Wait for Stabilization: Allow the thermometer to stabilize. It should read 100°C (212°F) at sea level.
- Adjust If Necessary: If the reading deviates, calibrate the thermometer as per the manufacturer’s guidelines.
Be aware that boiling points can vary with altitude, so adjust accordingly. This method is ideal for high-temperature applications like cooking or industrial tasks.
Using these standard methods ensures your digital thermometer operates with optimal accuracy and reliability.
Step-by-Step Instructions for Calibrating a Digital Thermometer
Preparing the Thermometer for Calibration
- Clean the Thermometer: Wash the probe with soap and water, including alcohol wipes if needed.
- Inspect for Damage: Check for cracks, loose parts, or wear that may affect performance.
- Read the User Manual: Review the manufacturer’s instructions for specific calibration settings.
- Gather Required Tools: Ensure you have ice, water, boiling equipment, and any reference instruments ready.
Performing the Ice Point Calibration Test
- Prepare Ice Water: Fill a container with clean crushed ice and distilled water to make a slush.
- Submerge the Probe: Insert the thermometer probe into the mixture without touching sides or bottom.
- Wait Till Stable: Observe the display for a steady reading of 0°C (32°F).
- Adjust If Off: Use the manual adjustment option if the reading is incorrect.
Performing the Boiling Point Calibration Test
- Boil Distilled Water: Heat clean water in a pot until it reaches a rolling boil.
- Place the Probe Carefully: Immerse the probe in the boiling water. Avoid container contact.
- Check Stabilization: Observe the thermometer display for stability at 100°C (212°F).
- Make Necessary Adjustments: Adjust the settings as directed if the reading deviates.
Adjusting the Thermometer (If Applicable)
- Find Calibration Settings: Access the adjustment feature specified in the manual.
- Enter Correct Values: Input the proper temperature readings for ice point and boiling point readings.
- Test After Adjusting: Repeat both calibration tests to confirm accuracy.
- Save the Settings: Complete the calibration process by saving the new configurations.
Follow these steps carefully to calibrate your digital thermometer. Accurate calibration ensures dependable readings for various applications.
Troubleshooting Common Calibration Issues
Even with proper techniques, calibration issues may arise. These can distort thermometer readings and cause errors. Identifying and addressing such problems ensures your digital thermometer performs accurately.
Misalignment of Calibration Points
Misaligned calibration points occur when thermometer readings deviate from established benchmarks. Here’s how to troubleshoot:
- Double-Check Reference Points: Ensure the ice point is 0°C (32°F) and boiling point is 100°C (212°F).
- Inspect the Thermometer: Examine for physical damage, loose components, or worn-out sensors.
- Verify Calibration Settings: Check for incorrect adjustments in the thermometer’s calibration settings.
- Repeat Calibration Process: Redo the ice point and boiling point methods, adhering strictly to instructions.
- Consult the Manual: Refer to the manufacturer’s guide for accuracy standards and correction steps.
Resolving misalignment issues restores the thermometer’s reliability and prevents measurement discrepancies.
Inconsistent Temperature Readings
Inconsistent readings indicate calibration instability or external interference. Follow these steps to identify and fix the issue:
- Confirm Thermal Stability: Ensure the ice and boiling water are at proper, stable conditions.
- Avoid External Influences: Calibrate in a controlled environment, away from drafts and heat sources.
- Clean the Probe: Remove debris or residue on the probe that may impact its sensitivity.
- Replace Faulty Components: If readings remain erratic, check for worn sensors or batteries.
- Run Multiple Tests: Test readings repeatedly to determine stability and accuracy trends.
Addressing inconsistent readings enhances the thermometer’s performance in various applications, from cooking to healthcare.
Troubleshooting these common calibration issues ensures maximum accuracy and prolonged thermometer lifespan.

How Often Should You Calibrate Your Digital Thermometer?
Regular calibration is important to maintain thermometer accuracy. The frequency depends on the use and environment. Certain factors can influence how often you should calibrate.
Factors That Influence Calibration Frequency
Usage Intensity:
Frequent use of thermometers can lead to a greater need for calibration. This is because regular usage can introduce minor errors and drift in the readings due to the wear and tear of the sensors.
Additionally, heavy usage over time may result in physical wear on the sensor components, potentially leading to a decrease in measurement accuracy. Therefore, it’s essential to monitor performance closely and calibrate as needed.
Environmental Conditions:
The environment in which a thermometer is used plays a significant role in its accuracy. Exposure to extreme temperatures, such as prolonged exposure to high heat or freezing cold, can compromise the functionality of the device.
Moisture can also negatively impact the device, particularly if it penetrates internal components, leading to inaccurate readings. Consequently, in harsh or variable environmental conditions, it is advisable to calibrate the thermometer more frequently to ensure reliable performance.
Application Sensitivity:
Different applications have varying sensitivity levels when it comes to measurement accuracy. For instance, high-precision tasks such as medical diagnostics or laboratory experiments often require stringent adherence to calibration schedules.
In these critical situations, even minor deviations from the correct temperature can lead to significant consequences. Regular calibration is therefore paramount to maintaining the integrity of results in such sensitive applications.
Manufacturer Guidelines:
It is vital to adhere to the calibration intervals recommended by the thermometer’s manufacturer. These recommendations are typically based on extensive testing and consideration of the device’s specifications and intended use.
Following these guidelines not only ensures compliance with best practices but also helps in maintaining the warranty and expected lifespan of the thermometer.
Device Age:
Over time, thermometers can experience degradation due to age and wear. Older devices may exhibit increased drift in accuracy, making regular calibration an essential step to ensure reliable measurements.
As sensors age, they may become less responsive or accurate, necessitating more frequent checks and recalibrations to meet required standards. Therefore, it is important to consider the age of the device when establishing a calibration schedule.
Consider these factors to set an appropriate calibration schedule for your thermometer.
Recommended Schedules for Different Use Cases
- Healthcare Settings: Calibrate weekly or biweekly for consistent patient temperature readings. Accuracy is vital here.
- Cooking Applications: Perform monthly calibration to ensure food safety. Avoid overcooking or undercooking.
- Laboratory Use: Lab thermometers should be calibrated before every critical experiment. Precise readings are necessary.
- Industrial Tasks: For factories or production, calibrate quarterly or as per regulatory standards. Reliability prevents errors.
- Personal Use: For home devices, calibrate every 6-12 months. Adjust frequency based on usage.
Stick to these schedules to maintain your thermometer’s accuracy across different scenarios.
Maintaining Your Digital Thermometer Post-Calibration
Proper maintenance after calibration ensures optimal performance and longevity of your digital thermometer.
Proper Handling and Storage
- Store in a Protective Case: Keep the thermometer in a protective case to avoid damage.
- Avoid Extreme Conditions: Do not expose the thermometer to excessive heat, cold, or moisture.
- Handle with Care: Avoid dropping or mishandling the thermometer to prevent internal damage.
- Keep the Probe Clean: Wipe the probe after every use with a soft cloth or alcohol wipes.
- Protect Against Corrosion: Ensure the thermometer is kept dry after cleaning to prevent rust or corrosion.
Regular Maintenance Tips
- Inspect Periodically: Check for any signs of wear or damage to the thermometer body and sensors.
- Replace Batteries Timely: Swap out depleted batteries regularly for consistent performance.
- Recalibrate Often: Test and recalibrate the thermometer according to usage intensity and environment changes.
- Follow Manufacturer Guidelines: Adhere to cleaning and calibration instructions mentioned in the user manual.
- Use Quality Accessories: Utilize approved storage cases and tools to ensure compatibility and protection.
Routine maintenance ensures reliable readings and keeps your thermometer functioning at its best.
Frequently Asked Questions About Digital Thermometer Calibration
Can All Digital Thermometers Be Calibrated?
Not all digital thermometers can be calibrated. Some models come pre-calibrated from the manufacturer. These devices use sensors that are fixed and cannot be adjusted. However, many digital thermometers include manual adjustment settings for calibration purposes. Always check the user manual to determine if your thermometer supports calibration. If it does not, you may need to replace it if accuracy declines. Investing in a calibratable thermometer ensures greater control over precision over time.
What Should You Do if Calibration Fails?
If calibration fails, first double-check the procedures you followed. Ensure you used clean, distilled water and proper techniques for ice and boiling point calibration. Inspect the thermometer for physical damage or sensor issues. Replace the batteries, as low power can distort performance. If problems persist, consult the user manual or contact the manufacturer for support. Persistent failure might mean the thermometer is no longer reliable. In such cases, consider replacing it with a new, accurately calibratable model.
Conclusion
Effective calibration is essential for ensuring the accuracy of digital thermometers, regardless of their application. Understanding how to calibrate digital thermometer can significantly impact your work, particularly in fields where precision is key. From maintaining proper hygiene in food preparation to ensuring patient safety in healthcare, calibrated thermometers are indispensable.
By following the steps outlined in this article, you can keep your thermometer accurate and reliable. Regular calibration practices, informed by why they are necessary, will not only enhance the functionality of your thermometer but can prevent costly errors in your work. In the fast-paced world we live in, accuracy should remain a priority, and your tools, like digital thermometers, should reflect that commitment.